Elastic Search는 색인, 색인을 생성하고 Collection Analysis, Sorting / Ranking, 기본적인 쿼리 처리를 도와주는 기능을 한다.
Elastic Search Architecture

* 기본적으로 검색 엔진이지만, NoSQL과 같은 엔진으로도 활용 가능하다.
* 수집 / 주석 시스템을 도와주는 Logstash(로그 스태시)쿼리 처리를 도와주는 Kibana(키바나)를 함께 사용한다.
* LUCENE -> 인덱싱 서비스 위에 색인 생성 시스템, Sorting, Ranking, Analysis 서비스를 덧붙인 것이 Elastic Service이다.
** Elastic Search + Logstash + Kibana = ELK Stack
DBMS와 비교
| DBMS | Elastic Search |
| DBMS HA 구성(MMM, M/S) | Cluster |
| DBMS Instance | Node |
| Table | Index |
| Partition | Shard / Routing |
| Row | Document |
| Column | Field |
| Row of columnar data | Serialized JSON document |
| Join | Nested or Parent/Child |
| SQL (DML) | QueryDSL |
| Index | Analyzed |
| Primary Key | _id |
| Configuration | elasticsearch.yml & Setting |
Elastic Search 중요한 요소
1. Cluster
- Cluster 구성 시 node 역할에 따른 구성이 필수이다.
2. Node
- 단일 노드로 실행이 가능하다.
- 노드의 이름을 지정하고 역할을 정의해서 용도와 목적에 따라 운영이 가능하다.
- master node: 개별 노드와 인덱스에 대한 상태 관리, 메타 정보 관리를 담당한다.
- data node: 색인한 문서의 shard가 저장되어 있는 노드로, 문서에 대한 CRUD와 검색, 집계와 같은 데이터 작업을 처리한다.
- coordinating node: 검색 요청이나 대량 색인 요청에 대한 라우팅 역할
3. Index -> Table
- 분산된 Shard에 저장된 문서들의 논리적인 집합
- Primary Shard와 Replica Shard로 구성되며, Data Node에만 위치한다.
4. Shard -> 분산 저장소, Performance를 위해 존재(더 빨리 병행하도록)
- 물리적인 데이터가 저장되어 있는 단위
- Primary Shard: 색인 요청이 들어오면 가장 먼저 생성해서 문서를 저장하게 되는 원본 데이터 개념
- Replica Shard: Primary Shard를 기준으로 복제하는 Shard로, 검색 성능을 개선하기 위한 용도로 활용한다.
5. Replica -> Shard의 복제본으로 다른 노드(Index)에 저장하는 개념, Availability를 위해서 존재
* 인덱스는 도큐먼트(데이터)를 모아 놓은 집합, 샤드의 개수에 따라 도큐먼트를 분산 저장한다.
예를 들어, 인덱스 1개, 샤드 2개의 환경에서 6개의 도큐먼트(데이터)가 저장된다면 다음과 같다.

인덱스 3개, 샤드 3개, 레플리카 2개의 환경이라면 다음과 같다.

사용 방법
version: '3.5'

services:

  elasticsearch:
    container_name: elasticsearch
    image: docker.elastic.co/elasticsearch/elasticsearch:7.13.2
    environment:
      - xpack.security.enabled=false
      - "discovery.type=single-node"
      - bootstrap.memory_lock=true
      - "ES_JAVA_OPTS=-Xms512m -Xmx512m"
    ulimits:
      memlock:
        soft: -1
        hard: -1
    networks:
      - example
    ports:
      - 9200:9200
해당 내용을 docker-compose.yml에 작성하고 docker-compose up -d로 실행한다.

- Elastic Search는 색인 작업을 메모리에서 진행하기 때문에 많은 메모리를 점유하게 된다.
따라서, Docker 메모리가 2.0 GB미만이면 Docker Container가 시작되자마자 죽을 수 있기 때문에 설정에서 메모리를 2.0GB이상 늘려주어야 한다.
Elastic Serach는 인덱스 또는 색인 하나만 제공하는 것이 아닌 여러 가지 색인을 따로 따로 만들어서 제공할 수 있게 디자인되어 있다.
-> 각 색인을 만들 때마다 인덱스를 만드는 과정이 필요하다.
* Index 생성 API (https://www.elastic.co/guide/en/elasticsearch/reference/current/rest-apis.html)

- target -> Index name
| 코드
import requests
import json

url = "http://localhost:9200/products"

payload = json.dumps({
    "settings": {
        "index": {
            "number_of_shards": 1,
            "number_of_replicas": 1
        },
        "analysis": {
            "analyzer": {
                "analyzer-name": {
                    "type": "custom",
                    "tokenizer": "keyword",
                    "filter": "lowercase"
                }
            }
        }
    },
    "mappings": {
        "properties": {
            "id": {
                "type": "long"
            },
            "content": {
                "type": "text"
            },
            "title": {
                "type": "text"
            },
            "url": {
                "type": "text"
            },
            "image_file": {
                "type": "text"
            },
            "post_date": {
                "type": "date"
            },
            "modified_date": {
                "type": "date"
            },
            "shipped_from": {
                "type": "text"
            }
        }
    }
})
headers = {
    'Content-Type': 'application/json'
}

response = requests.request("PUT", url, headers=headers, data=payload)

print(response.text)- Index Name = products
- number_of_shards = 색인을 나누는 분산 숫자
- number_of_replica = 복제본의 수
- analysis = 분석 정보
- mapping = 저장 정보
해당 py 파일을 phyton3으로 실행한다.

위와 같이 생성 응답을 받을 수 있다.
** Elastic Search는 여러 가지 인덱싱을 제공해주기 때문에 인덱스를 하나씩 생성해야 하며, 인덱스의 이름에 맞춰서 문서가 따로 따로 정렬된다.
* Index 확인
| 코드
import requests

url = "http://localhost:9200/products/_search"

payload = {}
headers = {}

response = requests.request("GET", url, headers=headers, data=payload)

print(response.text)
위와 같은 코드를 작성하여 생성한 인덱스를 확인할 수 있다.

위와 같이 인덱스가 존재한다는 것을 확인할 수 있다.
| 코드
import requests

url = "http://localhost:9200/products"

payload = ""
headers = {}

response = requests.request("GET", url, headers=headers, data=payload)

print(response.text)
위와 같은 코드를 사용하여 인덱스 스키마를 확인할 수 있다.

위와 같이 인덱스 스키마 정보를 확인할 수 있다.
* 데이터 덤프
| 코드
# SQL 에 연결하여 데이터를 추출하여 ProductPost array 로 돌려주는 함수
def getPostings():
    cnx = mysql.connector.connect(user='root',
                                password='비밀번호',
                                host='localhost',
                                port=9906,
                                database='데이터 베이스 이름')
    cursor = cnx.cursor()

    query = ('쿼리')
    cursor.execute(query)

    posting_list = []
    for () in cursor:
        print("Post {} found. URL: {}".format(id, url))
        product = ProductPost(id, content, title, url,
                             post_date, modified_date, assumeShippingLocation(meta_value), image)
        posting_list.append(product)

    cursor.close()
    cnx.close()
    return posting_list

# 엘라스틱서치에 출력하는 함수
def postToElasticSearch(products):
    putUrlPrefix = 'http://localhost:9200/products/_doc/'
    headers = {'Content-type': 'application/json', 'Accept': 'text/plain'}
    for product in products:
        id = str(product.id)
        print(id)
    for product in products:
        id = product.id
        print(id)
        r = requests.put(putUrlPrefix + id, data=json.dumps(product.__dict__,
                        indent=4, sort_keys=True, default=json_field_handler), headers=headers)
        if r.status_code >= 400:
           print("There is an error writing to elasticsearch")
           print(r.status_code)
           print(r.json())

# datetime 필드를 iso 형태로
def json_field_handler(x):
    if isinstance(x, datetime.datetime):
        return x.isoformat()
    raise TypeError("Unable to parse json field")

# 데이터를 표헌하는 class
class ProductPost(object):
  def __init__(self, id, content, title, url, post_date, modified_date, shipped_from, image_file):
    self.id = id
    self.content = content
    self.title = title
    self.url = url
    self.post_date = post_date
    self.modified_date = modified_date
    self.shipped_from = shipped_from
self.image_file = image_file- 색인화할 데이터의 필드와 인덱스 생성 시 만든 Properties 필드 명과 동일해야 한다.

파이썬 실행 시 위와 같은 결과를 얻을 수 있다.
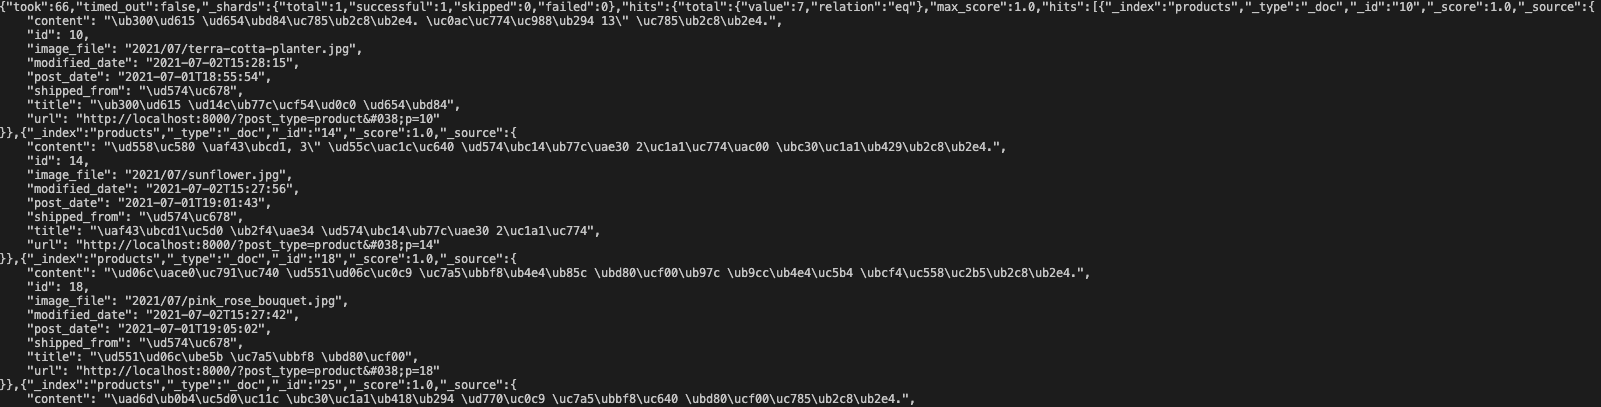
http://localhost:9200/products/_search API 호출 시 위와 같은 저장된 데이터를 확인할 수 있다.
** 검색 : Elastic Search가 제공하는 Endpoint로 가능하다.
http://localhost:9200/products/_search?q=keyword -> keyword로 검색 시 키워드에 맞는 검색 결과를 받아올 수 있다.
응답 결과 중, took 필드는 검색 응답까지 걸린 시간으로 밀리초로 표시된다.
* 웹 사이트에 Elastic Search 검색 연결하기
** 간단하게 http://localhost:9200/products/_search + 쿼리 파라미터 q에 keyword를 넣어 API 호출한다.
** 데이터 작업은 배치를 돌려 새벽에 하는 것이 좋다.
Elastic Search 사용 순서
1. Elastic Search에 Index 생성
2. DB에 존재하는 데이터를 Index에 Ingest(색인화) 진행
3. elastic_uri:port/인덱스 이름/_search?q=keyword로 색인화된 데이터를 빠르게 가져올 수 있다.
'Elastic' 카테고리의 다른 글
| [Elastic] 검색 랭킹 (0) | 2022.10.08 |
|---|---|
| [Elastic] 지식 그래프란? (0) | 2022.10.06 |
| [Elastic] 검색 엔진이란? (0) | 2022.10.01 |


